


Click on any image that has a border to enlarge. -
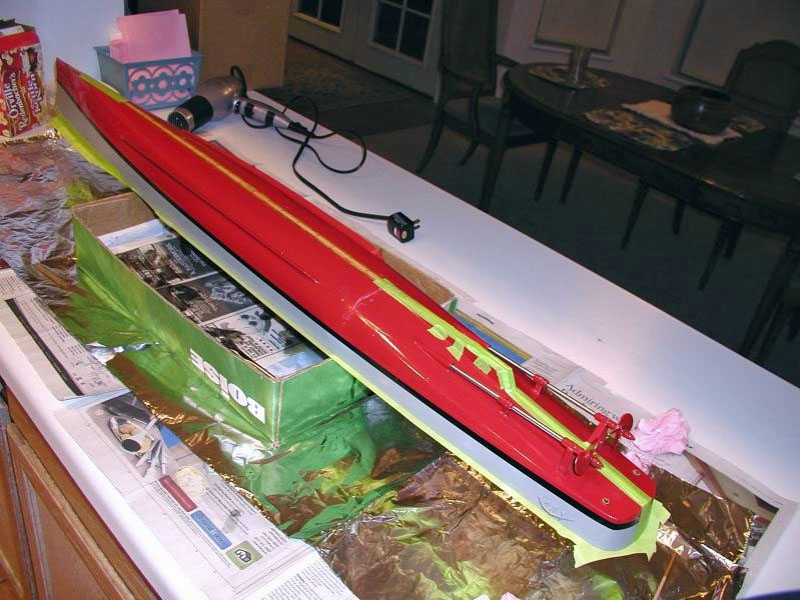
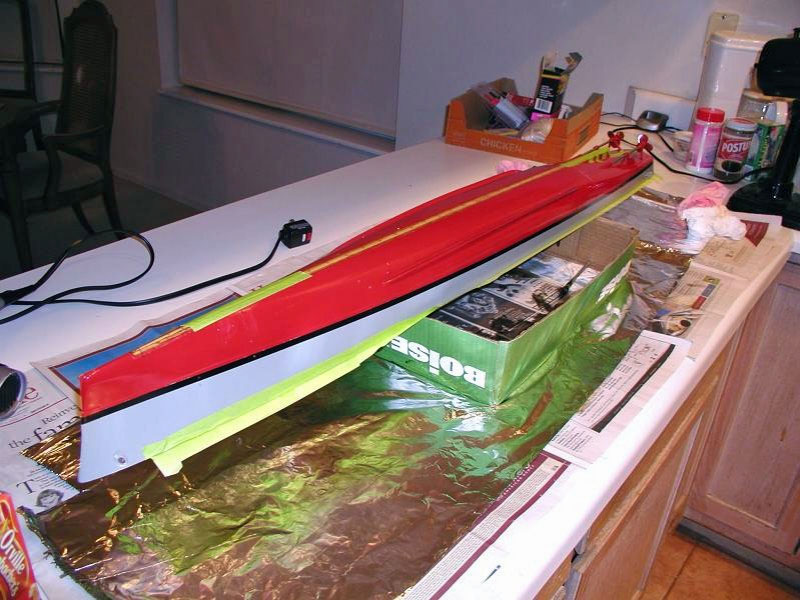
I marked a centerline down the keel and down the deck. The ship was turned upside down and very carefully cut with a sharp hand saw down the middle, lengthwise, starting at the stern and all the way up to about an inch from the bow (well into the bow-block). The old hull was tough and dulled the saw I used. The epoxy had held up pretty well, too. A band saw with a fine tooth blade would have been much better to use and made the job easy but none were to be found waiting in my driveway the day I wanted to do this. So, calling on skills from my Viking forebears, hand saw cutting it was. Once started, and after every few strokes with the saw, I turned the model over to make sure it was cutting down the centerline on the deck as well as the keel. The secret was to go slow and keep checking. When getting up to the final-inch of this long-cut near the bow the hull got pretty floppy and care had to be used to keep the bow-block from breaking that last inch. It needed to be completely intact because it is used for alignment of the hull when the lengthwise shims are installed.

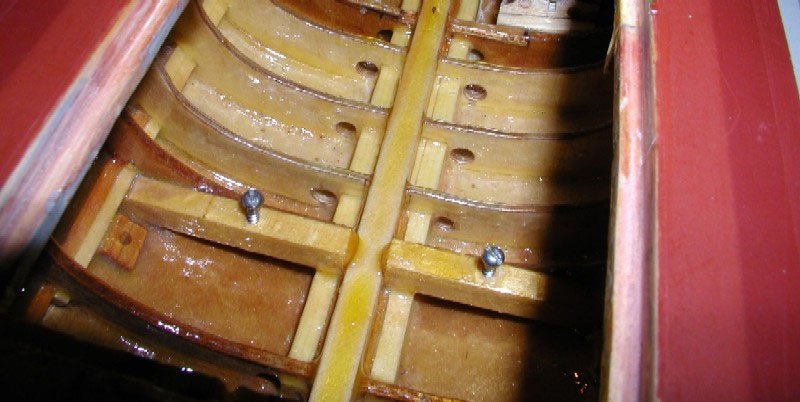
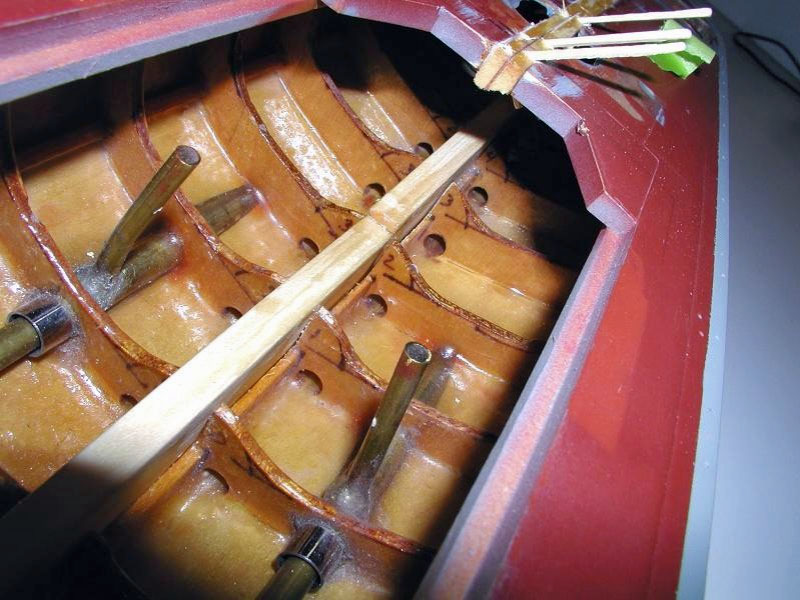
Once the hull was cut the areas were dressed up with a file and thin sanding block to get rid of the burrs in the cut, one Ľ X ľ X 48 inch long strip was inserted into the cut at the keel. It was tapered back about 3 inches as the bow-end, first, to reduce the strain on the bow block to keep if from splitting when the hull halves were pulled inward to join up to the shim for gluing. Near and at the stern a few short pieces of shim were cut and added to match the sharp up-sweep in the keel near the props. A single Ľ X 1 X 48 inch long strip was also inserted into the cut at the deck (again, tapered at the bow-end, and bent in profile along its length to match the gradual sweep of the deck fore to aft). Once the keel and deck shims were inserted and aligned, the hull was sprung in at the stern-end and held against the strips with a few rubber bands. The shims were adjusted several times so they fit flush with the bottom of the keel and the top of the deck. The hull halves were then carefully slid past one another to adjust out bends in the keel, left-right, up-down. Bulge in the sheer (from the overhead plan-view) was adjusted out, left-right too, as was twist in the hull. I have found that pretzels are best eaten and not sailed! It took a while to get it right. Lots of measuring and marking of the hull (placed upside down) onto the full-size plan-view of the plans made sure that the ship did not have a curve built into it. An inexpensive drafting triangle was used to "drop" edges of the deck down to the plans at regular intervals. Pencil marks were made directly on the plans and any curve was soon evident when comparing one side to another. As things lined up I tacked the shims into place with superglue. This helped other things to fall into place as the work progressed. The worst problem was twist near the bow. I ended up splitting the deck shim lengthwise with a razor say and re-glued it while twisting the bow back into place. A little more twist was put in for 'spring-back' insurance (the keel seemed to be okay and didn't need to be cut). You can see the slight miss-alignment of the foredeck center beam that resulted from the lengthwise cut and twisting action put into the bow to bring the stem at the bow is completely vertical, as is the stern. At times I thought it would be easier to take the twist out of a piece of red licorice! Actually a little planning and a willing helper saw to it that the job took all of about 10 minutes from razor saw cut to cured-glue.
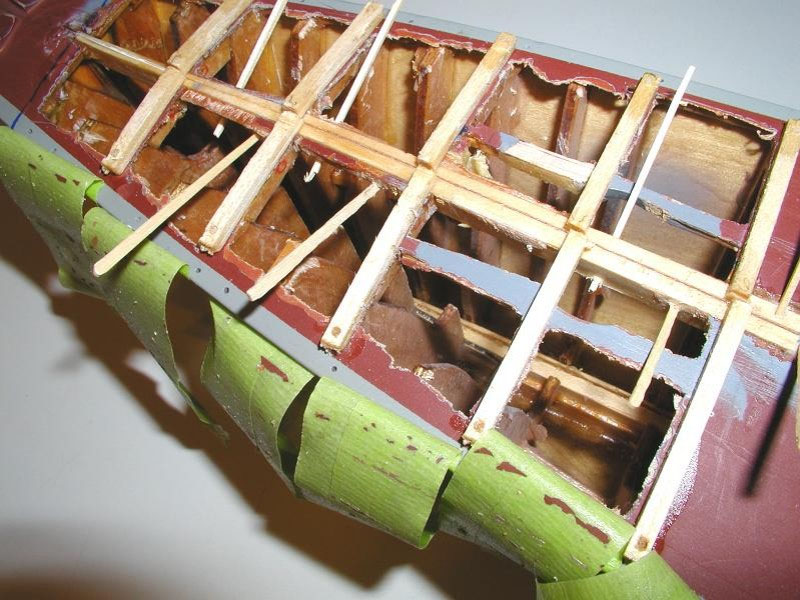
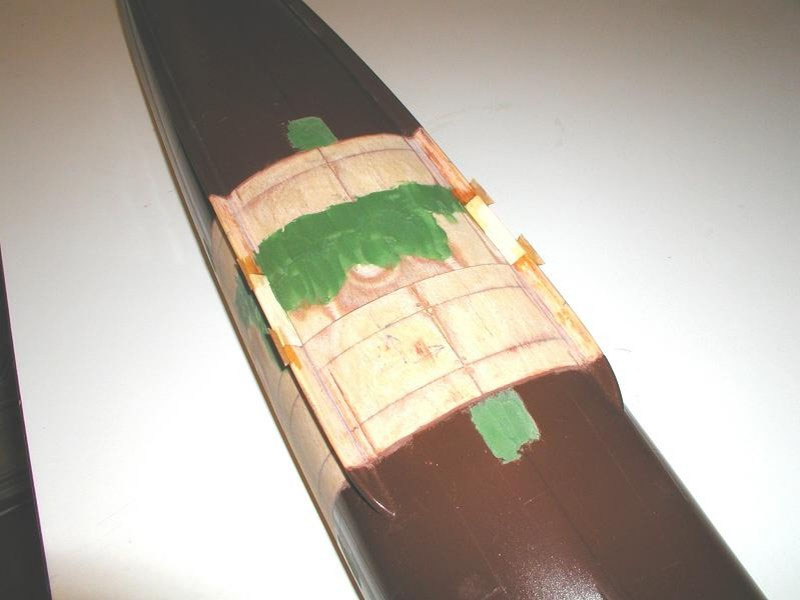
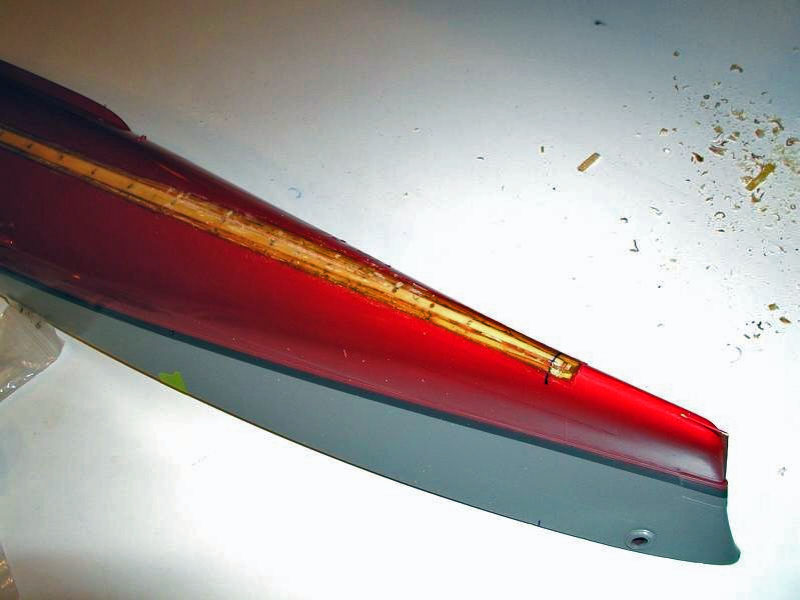
Once the hull halves were glued to the keel and deck shims I cross-drilled 1/32nd holes through the new, wider keel and deck strips into the old split keel and frames that they came into contact with. Toothpicks were inserted and super-glued to provide a good mechanical connection along the entire seam. Glue is great, but dowels (toothpicks) in addition to the glue are better! After the hull was all doweled back together, relief was cut into the hull sheer strips and deck beams so that the new decking would fit flush with the old decking at the edges. The new decking was test fitted and holes were drilled through it into the sheer stringers to align it. It was then removed and the underside of the new decking was coated with epoxy and then reinstalled, doweled (that were then cut flush). It was then coated with tape and the model was inverted to allow the epoxy to fill any minor cracks between the decking and the hull.
Next, where the plug-stringers and plug-keels (remember them?) where they feed through the frames of the old hull sections were now waterproofed with a good grade of slightly thinned long cure epoxy. The hull widening deck and keel strips were also epoxied on the inside. A layer of tape was used to seal the entire length of the hull over the keel strip and deck strip to prevent the epoxy from running through the minor gaps. Don't use polyester (Styrene) resins for waterproofing, or 5-minute and other quick-cure epoxy's because they are not waterproof and will allow water to gradually soak into the wood. Use long cure (two-ton) epoxy, something that takes 60-90 minutes to set up, to provide good protection. I have often thought of using the "WEST SYSTEM" epoxies as they are intended for just this kind of work, except on a much larger scale (read - real wooden boats and ships). The long-cure epoxy can be thinned slightly with lacquer thinner to make it brushable to soak into the wood for long lasting waterproofing. Several additional slightly thinned coats were applied to the inside with a disposable acid brush over a couple of days to ensure it was completely stabilized against water and water vapor. Before application of epoxy I cleaned the old and newly cured epoxy surface with lacquer thinner applied with cotton balls and Q-Tips to remove any of the curing-wax that rises to the surface of the epoxy is it "kicks-off". This ensures that the next coat of epoxy will bond well. No sanding was required between coats only cleaning for the next layer to adhere securely to the layer below.
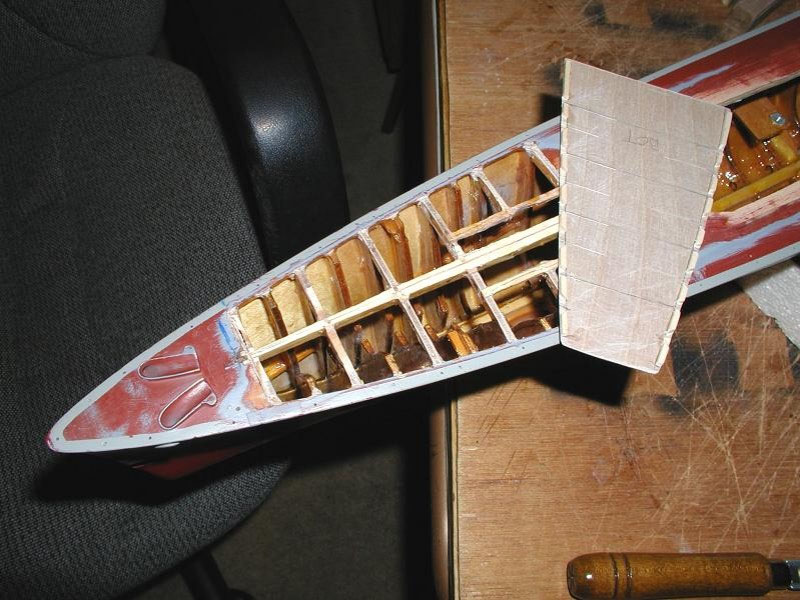
Stripping the old hull paint

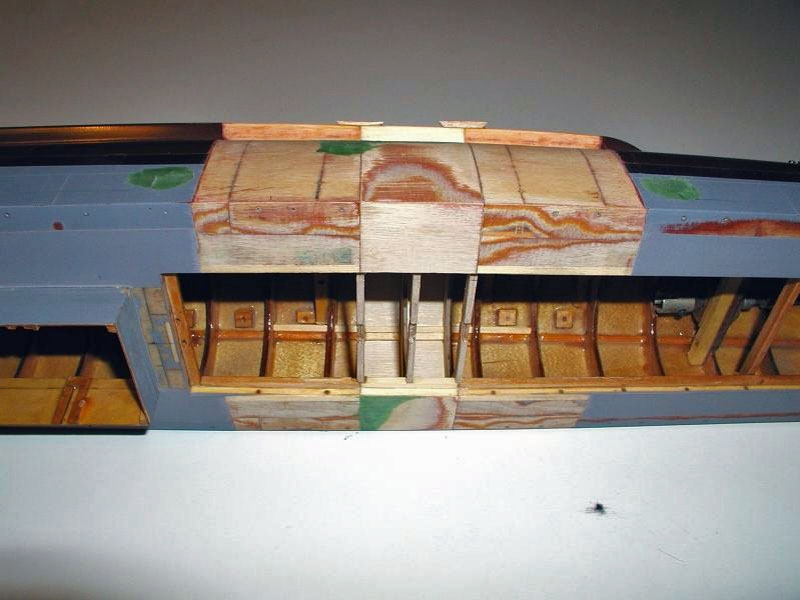
For the outside of the plug I wanted the new fibre-glass exterior sheathing to extend over onto the old hull, again by a couple frames to add strength. To remove the old paint down to the old fibre-glass and wood, I sanded it (mask and vacuum were definitely used to keep the dust to a minimum). Masking tape was placed over the old paint a couple frame back on each old hull-half to act as a marker where the sanding needed to stop. I did not want to use paint stripper because I was not going to remove all the paint from the hull, only a limited area and I did not know if residual stripper would cause problems at the edge of the old remaining paint and keep the new paint from bonding to it. Minor puttying was done to blend the new plug into the old hull where minor imperfections existed. Once sanded, a new masking tape barrier was put over the old paint at the sanding line to protect it from the epoxy used to bond the 'glass to the plug and sanded areas of the old hull in the next step.
The keel and deck strips on the outside top and bottom of the hull received similar treatment with sanding using tape barriers.

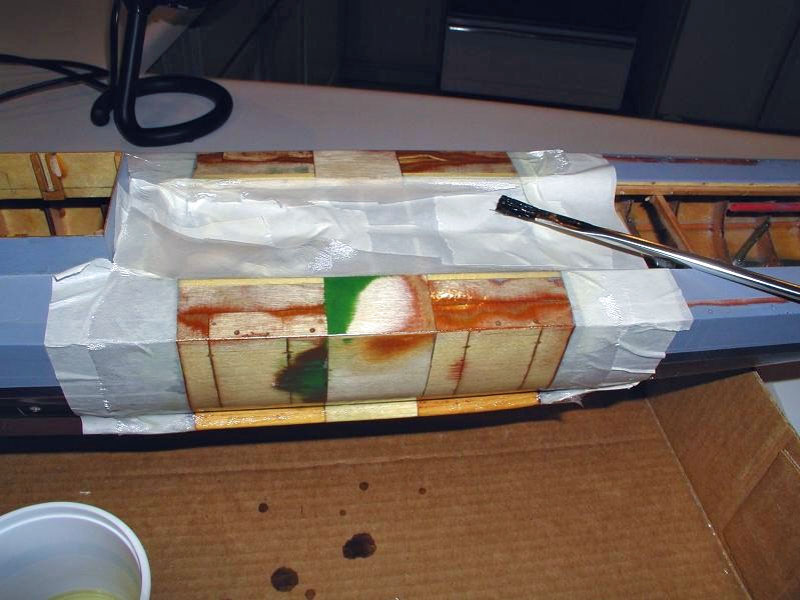
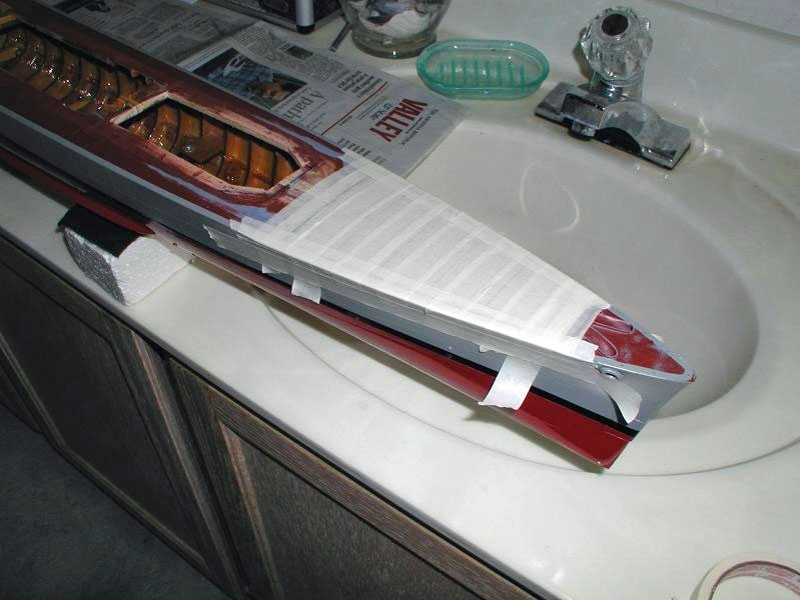
The hull was placed upside down over a "soda-flat" box to act as drip catcher (some of us still work on the kitchen counter - keep it clean!!!). A 10 X 10 inch section of ľ ounce fibre-glass was cut and laid over the prepared hull. The cloth was cut to size with the weave of the cloth laying diagonally to the length of the ship. This allows the strands of the cloth to pass over bends (like the bilge keels) easily and provides maximum strength over seams, like where the hull was rejoined. Long-cure epoxy was mixed and a disposable acid brush was used to apply the epoxy directly to the cloth as is lay in contact with the wood. Start from the center and work outboard. If lacquer thinner is used in the epoxy after it is mixed, it is easier to apply and wicks right into the cloth weave, binding it to the wood underneath. The thinner evaporates (yes, be sure to have adequate ventilation, being outside is best, and use a mask intended for the purpose) and the epoxy keeps the 'glass against the wood as curing is taking place. As the thinner evaporates the cloth is constantly checked and teased back into place. It will move. Some long-cure epoxies are already thin and require no further thinning. They do, however, need to be watched longer to make sure nothing pulls loose or that blisters form between the cloth and wood. Also watch for creases in the cloth to pop-up and use the brush to push them down again. Not something you just tend to between TV commercials.
The keel and deck strips on the outside of the hull where it was widened and rejoined lengthwise received similar treatment using the tape barriers, fibre-glass cloth, and epoxy to stitch it all back up again.
In both cases, once the epoxy starts to kick-off, a sharp X-Acto knife is used to cut the cloth where it overlaps the tape barrier. The excess cloth and the tape are then removed. The cloth bonded to the hull is put back down if removing the tape lifted it. More, fresh, epoxy is brushed along the X-Acto cut line with a much smaller brush to waterproof where the blade may have cut through to the bare wood. After curing overnight the sharp strands of 'glass are carefully sanded off to prevent damage to the operator! I usually put a second coat of epoxy over the cloth to act as a filler and provide protection against breaking through to the wood underneath if the ship runs aground. A little more sanding is involved, but is good insurance against wet-wood.
![]()

Back to Warship Models Underway
This page maintained by Kurt Greiner. Email me here.
This page viewed 117
Version 1.1
Last update 12/09