


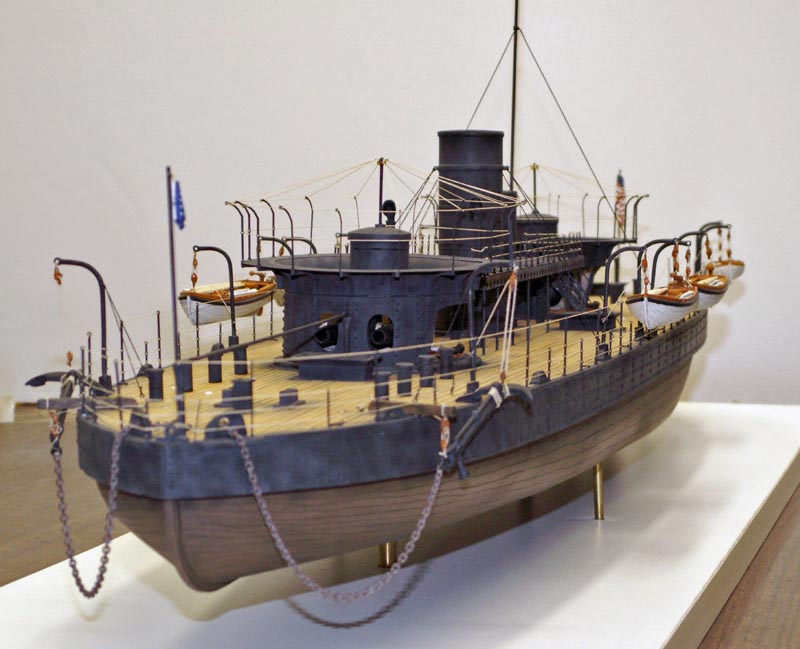
Willima Blackmore is the owner of Cottage Industry Models, which produces this kit.
William writes:
In the years that I have been producing resin model kits of Civil War ironclads in 1/96th scale I have been asked on several occasions if my models could be converted to R/C. Finally, a few years ago I converted my kit of the C.S.S. Palmetto State to R/C and wrote about it on this site ( "Yes Virginia, Resin Floats." See Gallery Page 2. )
In August of 2006 I released a kit of the U.S. twin turreted monitor U.S.S. Monadnock (kit # 96-005), and was amazed at the level of interest given the price tag. It was not long before several people asked if the model could be radio controlled. I always said cautiously that I believed it could be done, but only doing so would prove it. The problem is that even though the lower hull is hollow this beastie weighs in at a whopping 14lbs.!!! Brother, that's a LOT of resin!!!
In June of this year I received a commission to from a gentleman in England to prove my theory, and convert my Monadnock into the post-war version of the U.S.S. Miantonomah, sister ship to the Monadnock. The primary problem is weight given the model's very low freeboard. To this end I decided to mold a fiberglass hull using the original rubber molds I use to produce the model as a kit. I also used the original polyurethane resin to soak into the glass cloth so as not to have any possibility of ruining my very expensive production molds. After several practices I produced an upper and lower set of hull pieces suitable for my needs. However the upper hull was a bit too heavy.
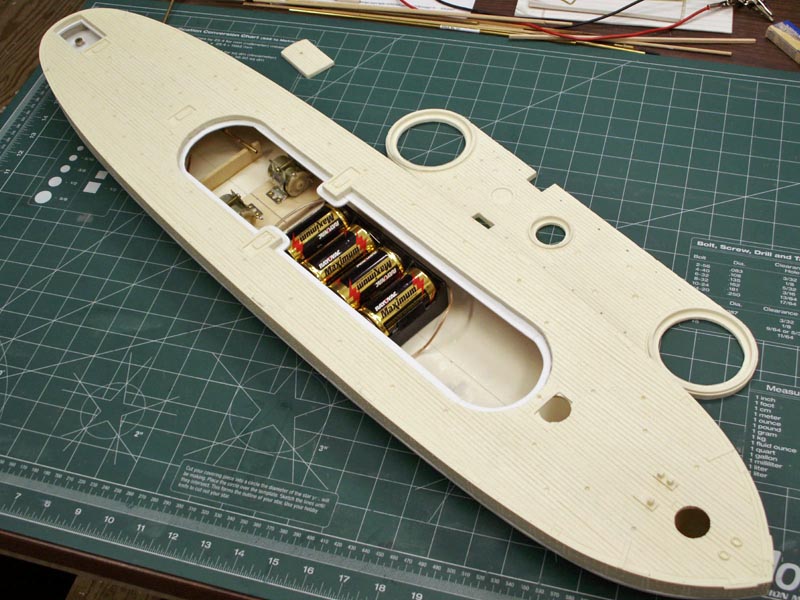
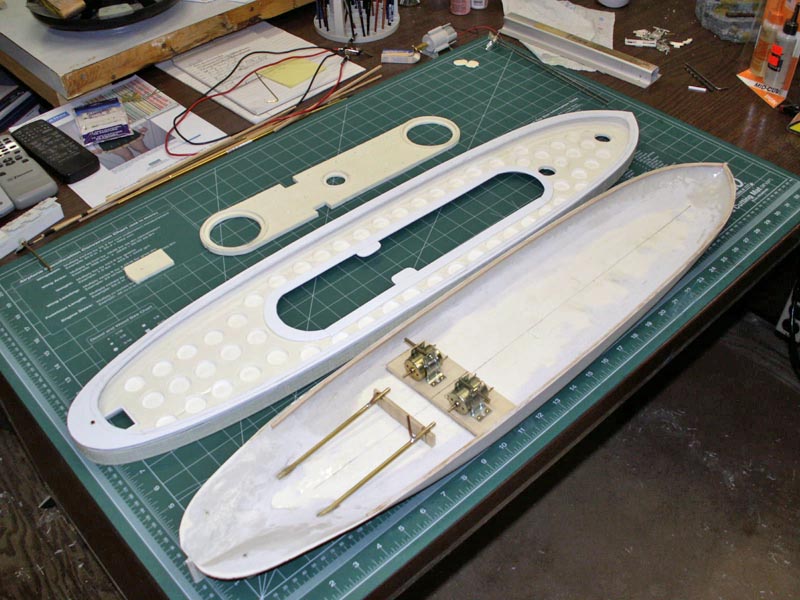
The first thing to do was to lighten the Upper hull a bit more, so I used my drill press and a grinding bit to mill out a series of lightening holes on the underside of the piece. This saved me several critical ounces of weight. After playing around with some ideas about motors, batteries and R/C gear I realized that what I had done thus far would still not be enough to make the model float at the proper waterline. Now.......I said this could be done, I did not say it would be easy. After several days of grinding my brain gears I realized I could not save enough weight anywhere else in the build to accomplish the task. Then I hit upon the idea that if I could not make the model any lighter I could give it a deeper draft and spread the load over a much wider area. So I cut 2 sheets of styrene plastic each .075" to fit the underside of the Upper hull, laminated them together, cut out the center to match the Lower hull, and glued up the entire thing. This lift gave me an extra .150" depth spread out over the entire flat bottomed hull of the model. The float test in the bathtub confirmed that I could get all my gear and batteries in the model and all the other "stuff" attached with some freeboard left over to properly trim the model with ballast.
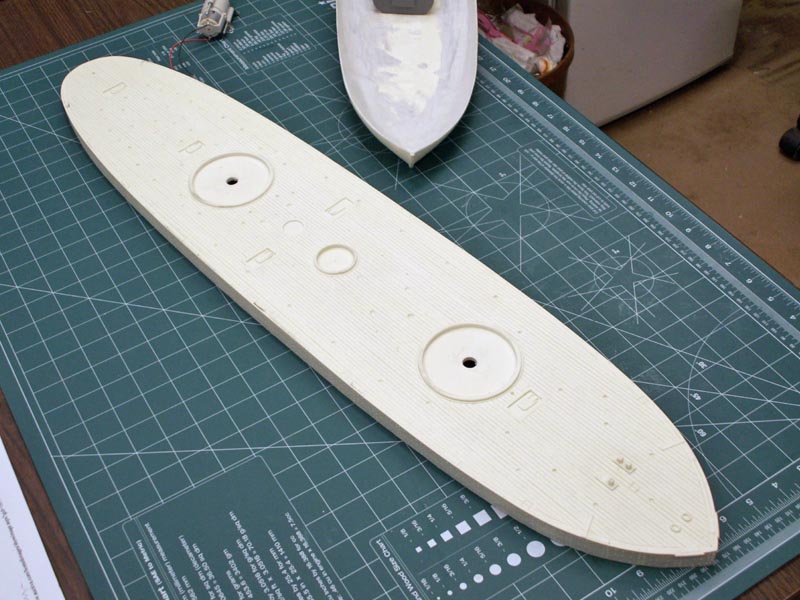
The other considerations in weight I also thought about were all the attachments above the main deck. I cut out the bases for the gun turrets, hollowed out the stack and vents, and replaced the heavy cast metal guns, and carriages with resin ones. I even hollowed out the pilot houses on top of the gun turrets, and am considering the idea of using polyfoam for the ship's boats, vs. the heavy resin.
The next very important consideration was watertight integrity. On a model
with such low freeboard this is a biggie since the real ships suffered the
same problem. I attached a lip around the underside of the Upper hull where
the center section of the deck would be removed for access, and also at the
stern where the rudder post access panel was that would be coated with Vaseline
to help keep out the water. I also intend to add a small coaming around the
area on the deck itself to keep the water away from the seam as much as possible.
Not really a scale item, but when I am done it should look like it belongs
there since some ships of the time sported this feature. I also plan to install
a W/T box for the batteries and radio gear. The real ship had a false bow
installed after the war for a cruise to Europe that will also be put on the
model. This should also help keep some water off the deck. As work progresses
on the model more updates will follow.
August 30, 2007 Update
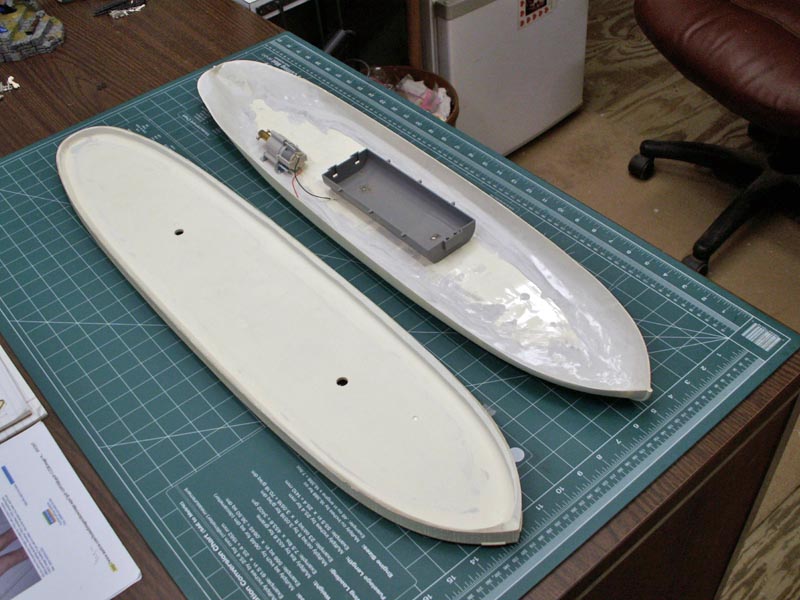

On Picture 8 you can see the hull all glued up with the white plastic lift I used to deepen the hull draft.
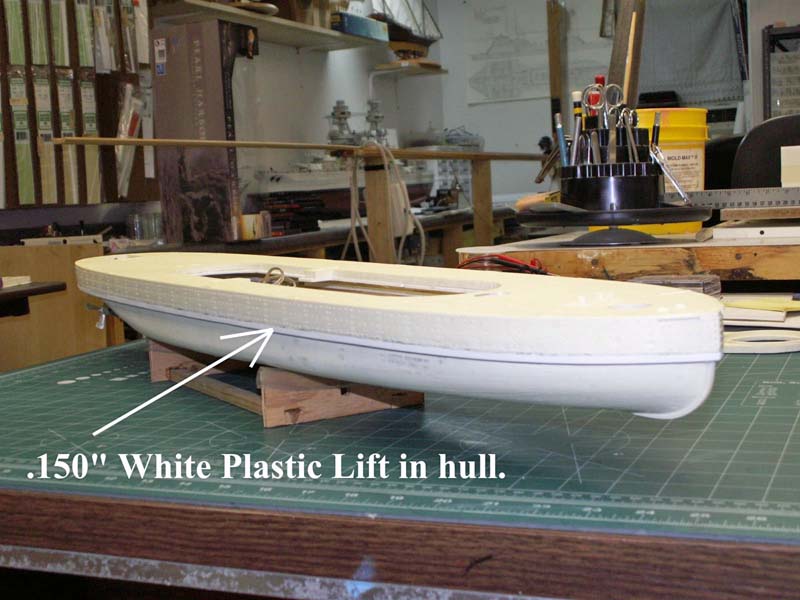
Picture 8
A few more items had to be changed in the conversion of my Monadnock because several of them just could not be made to work reliably. I completed the W/T box only to find that I did not plan ahead far enough either for the batteries or for the weight issue. The first problem I found was that there was not enough room for the "D" sized batteries and R/C gear. The larger cells also created too much weight. The answer was to eliminate the battery pack for the receiver; definitely not my favorite choice, and reduce the main drive batteries to "C" sized alkalines.
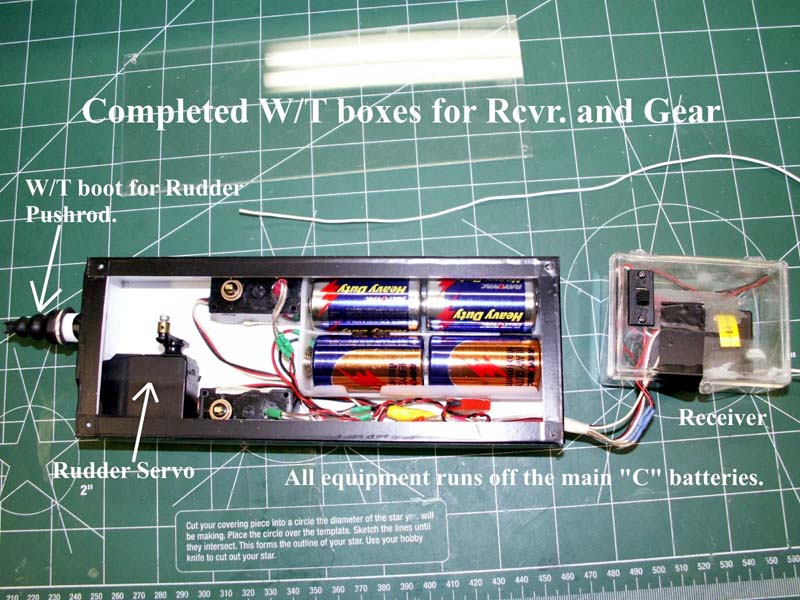
The second issue I tackled was how to install some kind of speed control. I have to be careful here because the laws governing R/C equipment in Europe are different than the U.S. so I needed to plan on a system that could be installed easily and also used similar components. I decided to convert a pair of servos into speed controllers and wire them together so they could be plugged into a single jack on the receiver. I bypassed the servo motors and wired them directly to the main drive motors in the ship. The potentiometers on each servo can be adjusted easily to fine tune the system.
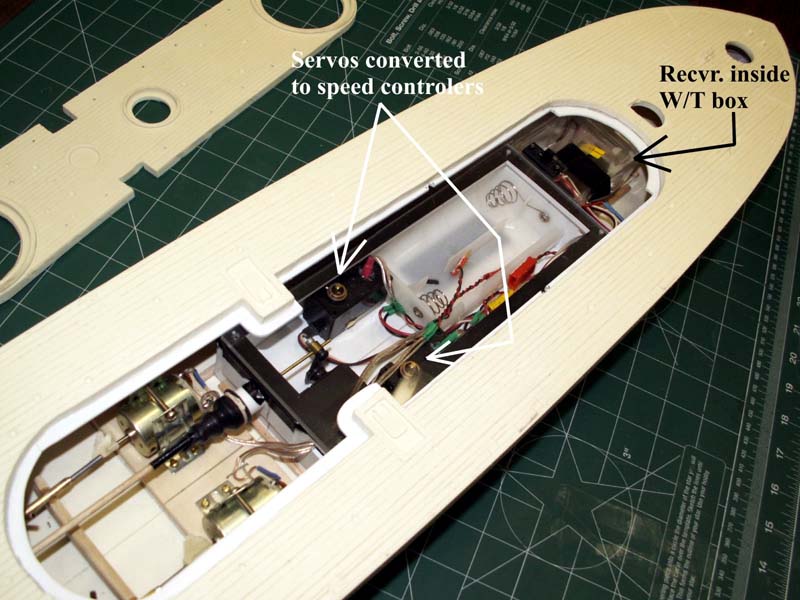
Once the Speed control issue was solved I had to find a way to jam all the gear into the W/T box. Well, it would not fit, so I had to build another box for the receiver. I found a small plastic box with a flip top that I placed the receiver in, and drilled holes for all the connectors. So now I have two separate W/T boxes joined only by the wires between the units. In order to get them into the model and keep them in place I glued a few strips of wood into the bottom of the hull that hold these boxes in place. This allows the entire W/T system to be removed and modified or repaired if the need arises.
The next issues I will be tackling are the universal joints between the motors and prop shafts, and attaching the rudder, which will probably have to be built slightly oversized. My conversion of the C.S.S. Palmetto State kit into R/C proved that the model handled very much like the real ship; Slow and unwieldy. In view of the low power of the motors and small size of the real ship's rudder I think it would be safe to assume this one would handle like a pig.
![]()

Back to Warship Models Underway
This page maintained by Kurt Greiner. Email me here.
This page viewed 423
Version 1.1
Last update 12/09