


Click on any image that has a border to enlarge. -
It had to happen eventually. I simply ran out of excuses - the workshop is built, the website is up to date, everything is going well at work. So, finally, I am working on one of my own models LOL.
Follow along on my build of the USS Seneca, a Navajo Class Fleet Tug built during World War II. I chose the Seneca, as she had the features I wanted to model in an ATF - round wings, stack, and Measure 22 camouflage.
To see some pictures and read more about the real Seneca, click here. (Offsite Link)
In this gallery, rather than flatly just show the steps in building the model, I want to share some tips and tricks for doing some of the more interesting bits.
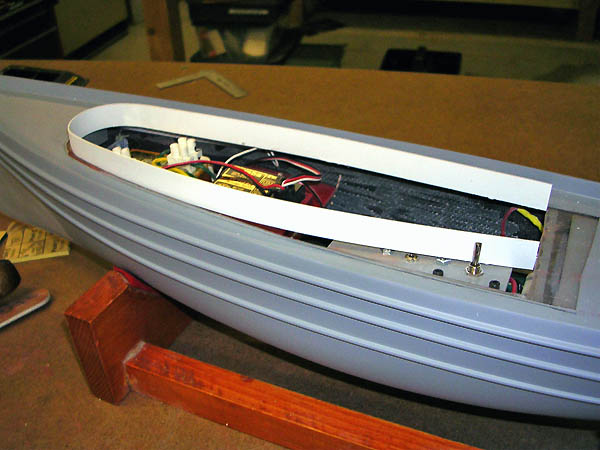
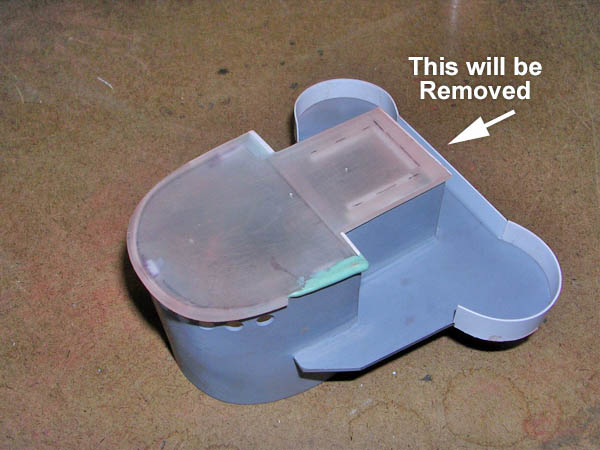
Installing the coaming. The coaming will be under the superstructure,
and will prevent any water that seeps under the superstructure / deck seem
from dripping into the hull. It also helps to secure the superstructure
to the hull, which is vital if a gust of wind ever hits it, and pushes the
model sideways into the water. Don't ask me how I know that....
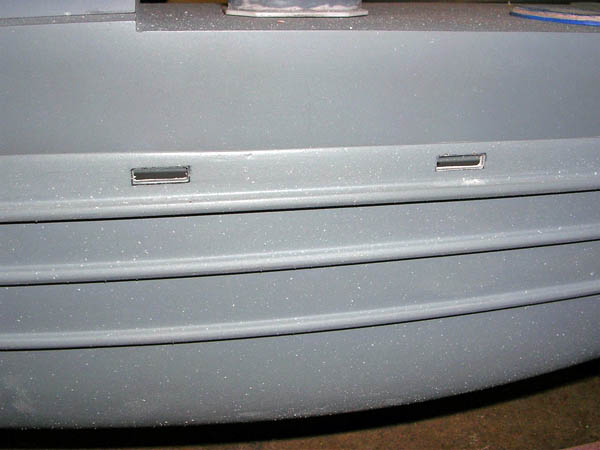
To cut the deck drains, I first made a template out of an index card, that
both defined the size of the hole, as well as the proper spacing above the
rub rail. I roughed out the center with a dremel engraving bit, and
filed to finish size. A tedious job, but necessary for both scale
appearance, and the functionality of the model - they really do drain!
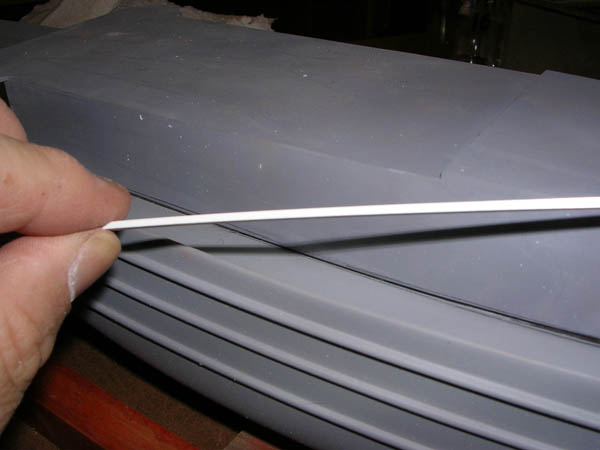
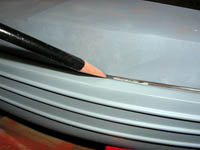
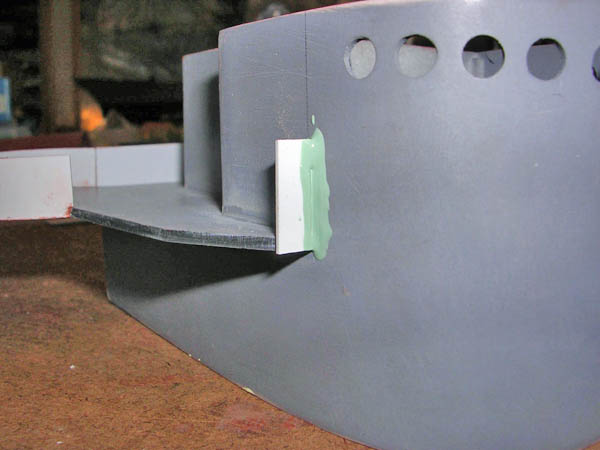
Fitting superstructures to decks is always a bit fussy. One way to
speed the job is to make your superstructure (or trim it, if using a commercial
fiberglass superstructure such as this one) a bit higher than the final
dimension. Take a strip of wood or plastic that is equal to that
amount (in this case, it is a .080 Evergreen plastic strip) and lay it on
the deck next to the superstructure
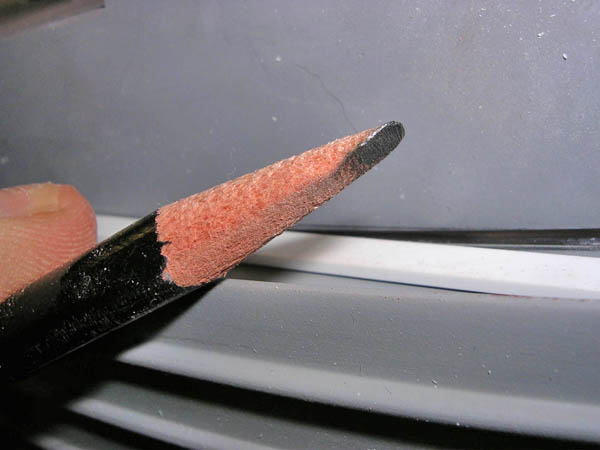
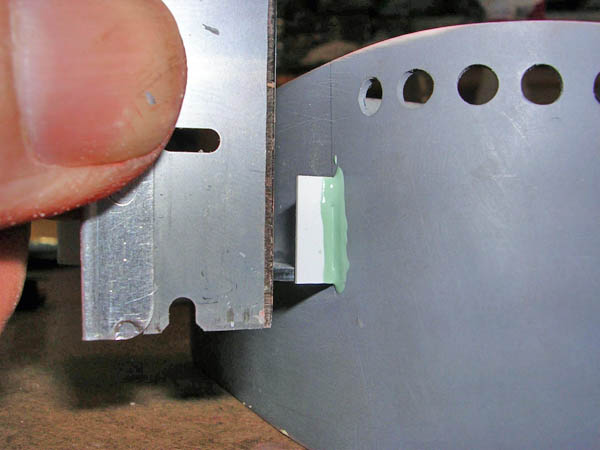
Sanding a bevel on the edge of your pencil will allow for more accurate marking
out

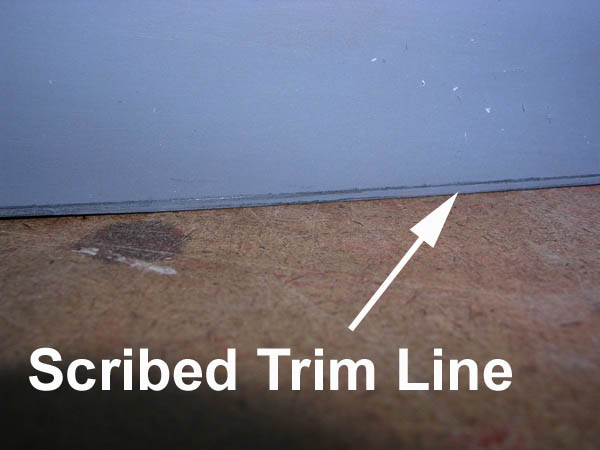
When you are done, you should have a trim line that exactly follows
the contours of your deck
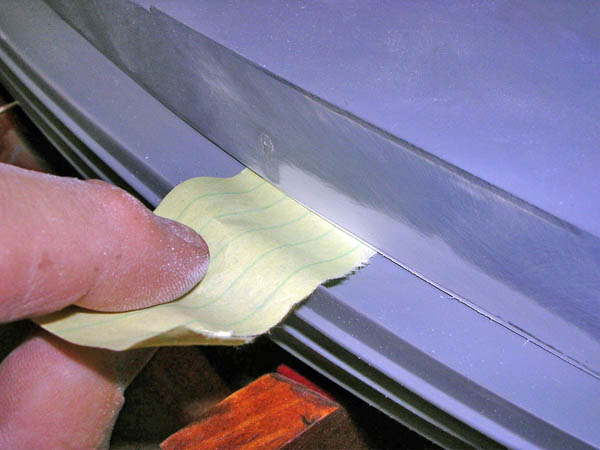
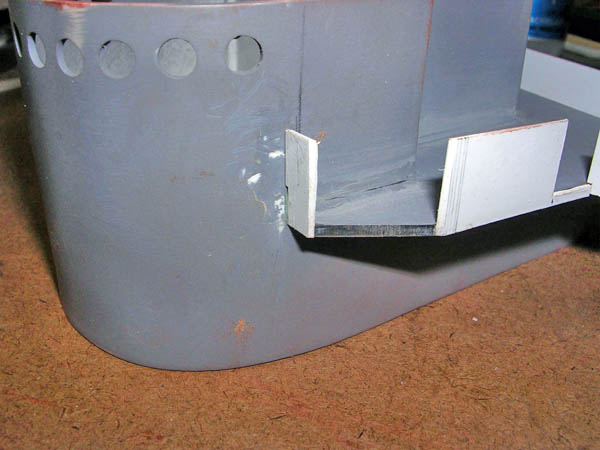
To refine the fit, drag a sheet of paper under the seem - sand until it catches
uniformly around the base, with no spots that is slides easily under.
For the circular shields, I took some .020 plastic sheet, and rolled it over
a round hobby knife barrel to start the curve. Then I tacked it into
place with thin CA. Once lightly attached, I applied several large
drops, allowing it to flow freely. Quickly following this up with the
ragged edge of a paper towel to wick up the excess, the resulting bond is
very strong. You will note a connective piece between the two 20mm
gun tubs; later research showed this to be an error and it was removed.

A pretty common challenge on ship models is how to build bridge wings. The
way I do it, is to incorporate a base of .060 lexan (polycarbonate plastic
sheet) for the deck of the wings. This penetrates into the superstructure
for a strong joint. Once this has been puttied and primed, I then start
building the wings off of it.
This joint between the front of the bridge wing and the superstructure is
very obvious, so it needs to be neat. First, I pushed some Evercoat
putty into the gap.
After a minute or two, the putty reaches the gel stage, when it can be easily
trimmed with a sharp knife. Here, I am using a single edge razor blade.

You can save a lot of work by taking advantage of the unique properties of
two part putties

The other pieces go on in a straightforward manner, using solvent cement
to insure a solid plastic to plastic bond. Bevel parts that mate at
an angle to insure the greatest possible surface contact, which will make
for a stronger part. Let sit overnight, and then trim and sand to the
final shape.
Ok, this is a bit overboard from a documentation point of view, but I think there are some good illustrations of small part soldering and wire work here that justify it. That, and I took the time to take the photos.
My building style sometimes forces me to remove details from hulls, as I do a lot of sanding and preparation before painting. One such detail that I deleted from my ATF were the Hawes Pipes, the bulwark penetrations that ropes pass through. They are beveled on both sides to prevent rope chaffing.

To build my replacements, I started with a form tool. This was made using a Dremel tool cut off wheel, finishing with some hand filing.
Most brass wire is stiff when you purchase it from a hobby store, which is
a good property generally. For our purposes, we want to soften it so that
it will bend easily. To accomplish this, just heat the wire briefly
until it glows dull red, and let it cool naturally. I have some old
firebricks (used to line fireplaces, available at most home centers) to use
as a worksurface for heating and soldering.

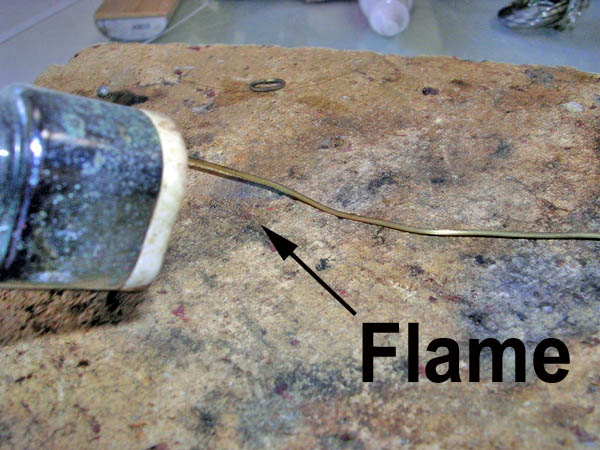
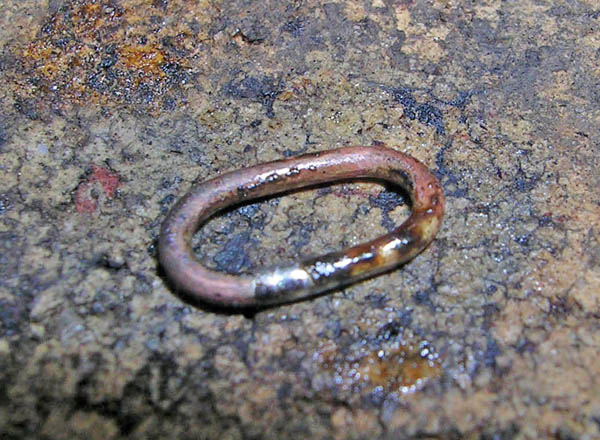
This poor example of photography shows the annealed wire wrapped around the
form tool. Try and do it with one fluid motion, as each time the wire
is bent it will harden a bit. All is not lost at that point, just heat
back up the wire and anneal again.
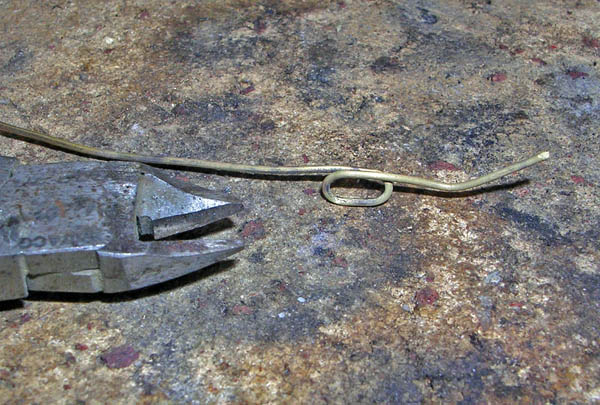
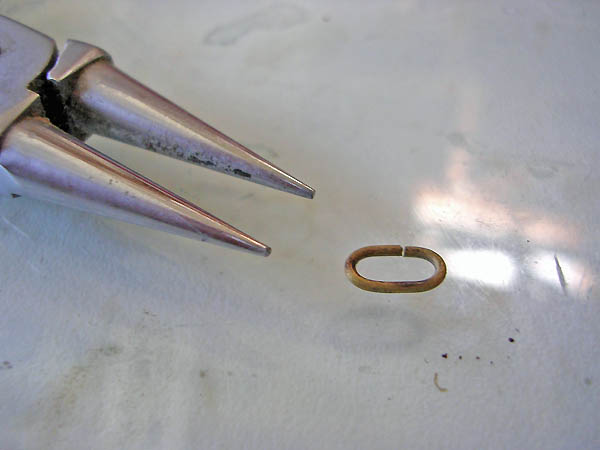
The finished loop is slid of the tool, ready to be cut.

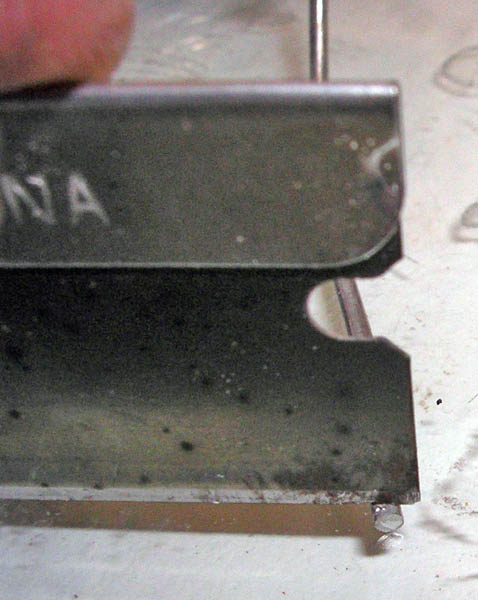
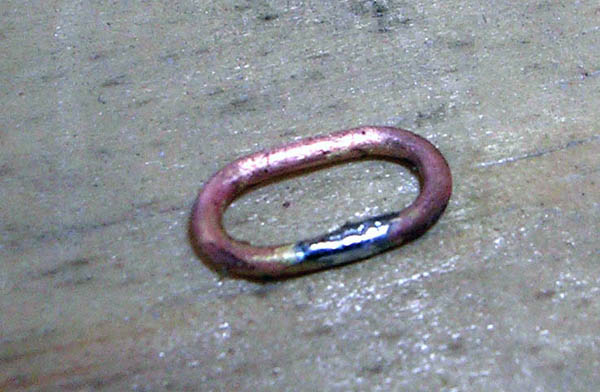
The secret to getting a nice joint is to cut with the right type of cutters.
These are flush cutting pliers that I use only for cutting brass wire,
not steel or anything else. This protects the jaws, keeping a nice
smooth cutting surface. This particular pair is made by Snap-On (a
legacy from my years as an Auto Mechanic), but there are many sources
for high quality pliers, such as Xuron.
If can, try and keep a second pair just for cutting plastic, it will
come in very useful.
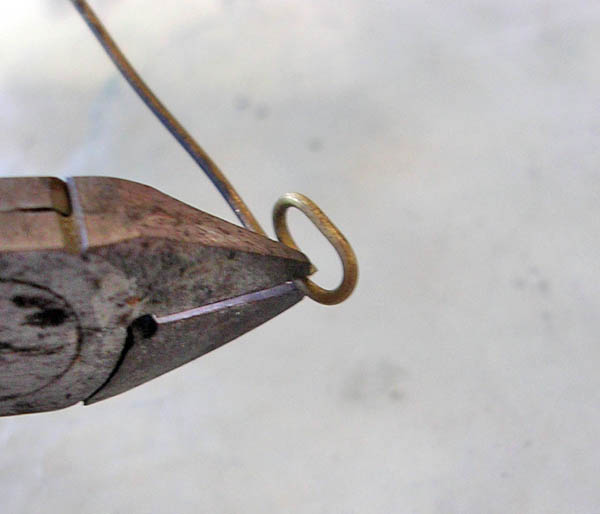
At this point, the part will need a little twist to align the two ends, and
possible a bit of nudge. The round nosed pliers, shown next to the
hawse pipe, will accomplish both nicely.
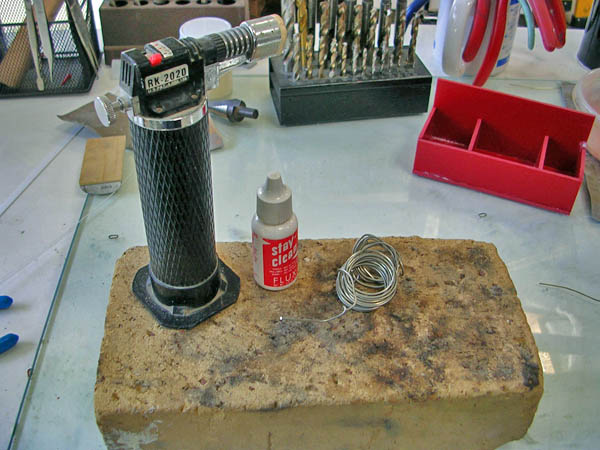
This is the set up I use for most soldering. I like the speed of the
torch instead of a soldering iron or pencil, but use whatever you feel most
comfortable with.
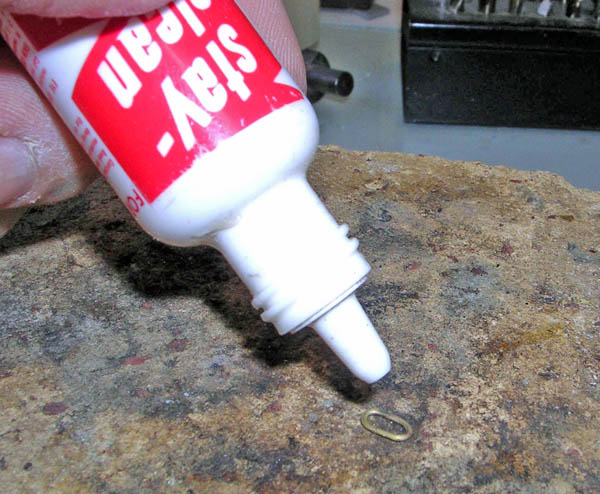
Flux is your friend! A clean solder joint is a happy one, and flux
does a great job cleaning.

Now here is a trick that was taught to me by an old ship modeler. A
lot of guys just slop on solder, result in great gobs that have to be removed
later. A better approach is just to use a tiny bit. Trim a little
off with a razor blade, use a pair of tweezers and place it next to the joint.
A bit of heat, and it will flow right in
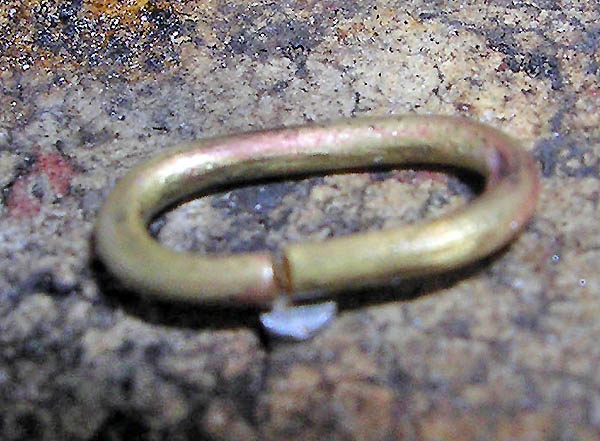
You want to see a nice shiny joint after the solder has cooled
A quick wash with some water to get the flux off, and it is starting to look
pretty good

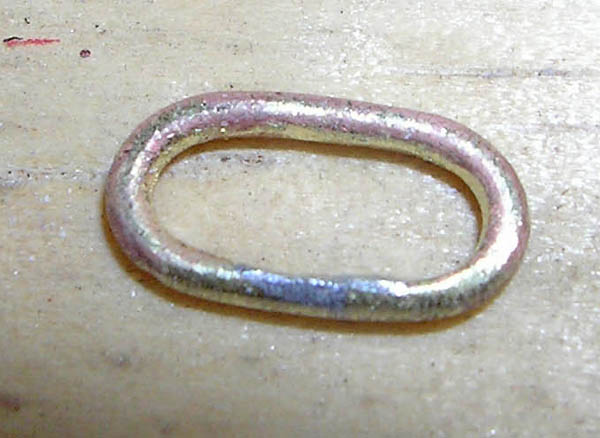
A few swipes with a round file cleans it up, ready for installation
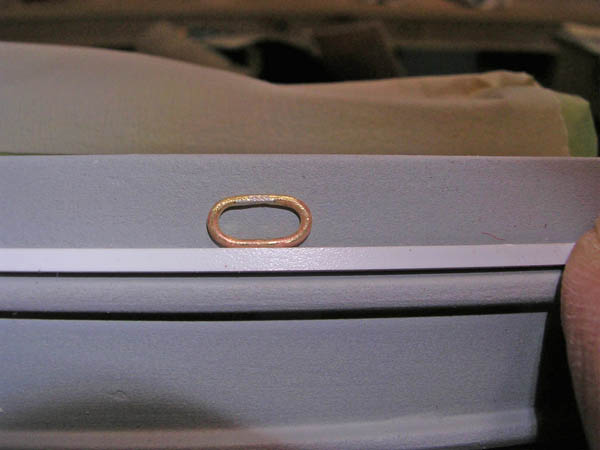
Using a plastic strip as a gauge to located the hawse pipe.
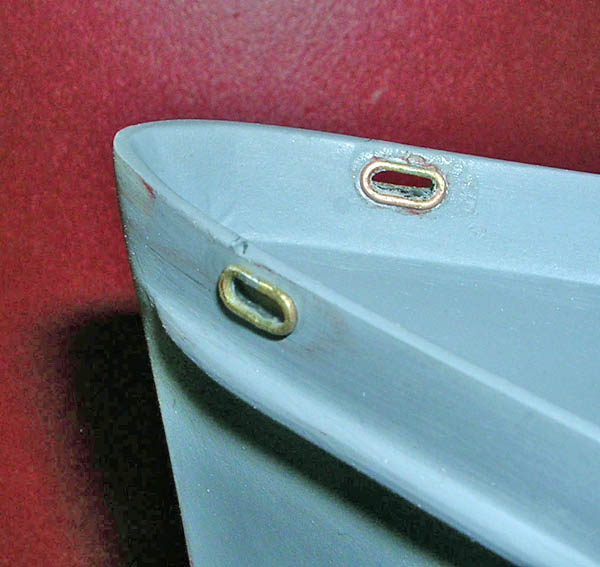
Eyes mounted up in the bow, one on each side of the bulwark. A Dremel
grinds through to form an oval slot
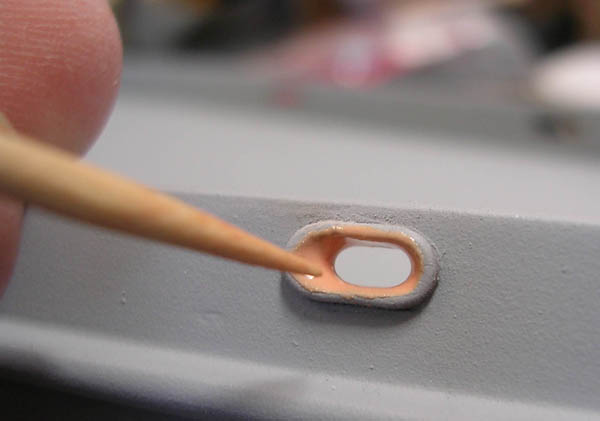

I mixed up a thin batch of Evercoat, and using a toothpick in a rolling motion,
applied it around the circumference of the oval. Surface tension pulled
it away from the center, making a nice tapered interior.
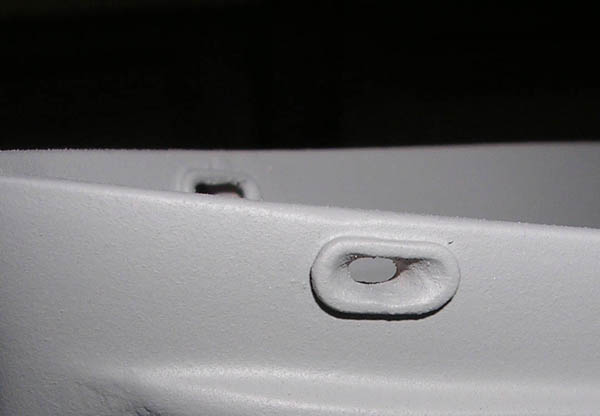
The first coat of primer shot over the area. A small round file can
improve the taper, if needed.
Believe me, it took longer to write about this than to do it!
![]()

Back to Warship Models Underway
This page maintained by Kurt Greiner. Email me here.
This page viewed 178
Version 1.0
Last update 09/05