Click on any image to enlarge. -
Her Sea Trials

William writes:
Here are some pics of the interior of the Arizona. I found I had to document her this way so I could create a Tech Manual to remember how it all went together.
I used the Tamiya High efficiencey gear boxes to make the four gun turrets rotate, and the anchor windlass work. The main windlass gear box was mounted on a slide with a large gear on one side of the box. A similar gear was mounted on a drum made of sewing spools. I also mounted ball bearings in the spool for easy turning. I mounted this so that the gears would line up, then mounted a pair of contacts to the slide and the base board. The hard part was a ratchet device that would ride on the main gear on the spool. It was mainly a matter of getting the weight and balance of the pawl just right. A slide switch on the radio controls the whole thing. I used a metal anchor that is slightly out of scale, but works well. When the slide switch on the radio is in the center position the anchor is totally retracted; when the switch is thrown all the way forward the slide moves to the rear and disengages the pawl, allowing the anchor to drop. When the switch goes the other way the pawl falls back onto the gear teeth and the contacts close at the same time. The motor turns on and cranks the anchor back up.
The turret machinery is built as directed then some of those threaded brass inserts that the airplane guys use to screw down their hatch covers on their planes are threaded onto the ends of some brass extensions. These act as worm gears, which engage large spur gears on the bottom of the turrets. You get rotation as far as you want to go on 2 turrets at a time without any complicated micro switches and stuff. The down side is that you have to run the system manually so as not to tear up your superstructure. You can also easily lift out the turrets and put your hand down the barbettes to work on the inside.
I also wired up lights along the inside of the hull that have replaceable bulbs. When you are trying to work on the boat at home the tight areas make it difficult to see. So I figured that these lights would allow me to work on the boat without having to fight with trying to hold or position a flashlight at the same time. Basically it lights up the entire inside of the model like a room on about 6 volts.
The main drive is two 540's with a reduction of 6:1. Any questions just give me a shout at wjb@awod.com anytime. I plan to get the gun firing mechanism up and running soon.
September 2006 update
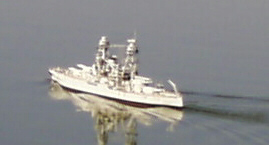
Some current views of the model on the water
Geoff was kind enough to mail me these photos of his project, a 1/96 scale Belknap class guided missile cruiser that was built from scratch. Only a few fittings and the helicopter were purchased for this model. One unusual feature - the hull is metal, covered with fiberglass for water integrity.
Thank you for sending these in Geoff, and I look forward to seeing your next project!
This fine model of the USS Patterson, a Knox class frigate, was built by Jeff York
Jeff also sends in photos of his latest build, a Flight IIA Arleigh Burke. Tenatively, it will be the USS Momsen (DDG-92)
Here are a couple of shots taken at the Task Force 100 regatta
The following shots were taken elsewhere in New England, and are fine examples of how to photograph a model warship for maximum realisim, taking advantage a of gray day.
Back to Warship Models Underway
 This page maintained by Kurt Greiner.
Email me here.
This page viewed 133
Version 1.51
Last update 09/06