
For some time now I have always wanted to make vents that look like or as close to the real vents that are on Burke class DDG's. I finally came across an ideal that I had to try and it worked out pretty good for me so I am passing it along to others. I first started by using Angled styrene .080" (fig 1). I would recommened for others and my self in the futurte to use the .060" styrene to get a tighter louvered vent apperance.

Figure 1
The first thing that I had to do was to measure the area where the vent that I was makingwas going to be placed. I then cut a piece of sheet styrene to be a little bit bigger than what was needed, I would make the piece 3/16" taller and 1/4" longer to give some over lap. I then would take the angled styreneand lay it so that the two edges would be glued to the styrene. I contiue with this until the entire piece of styrene is covered. After that is done I then placed another layer on, but this layer is placed at 90 degrees to that of the first layer. (fig 2)
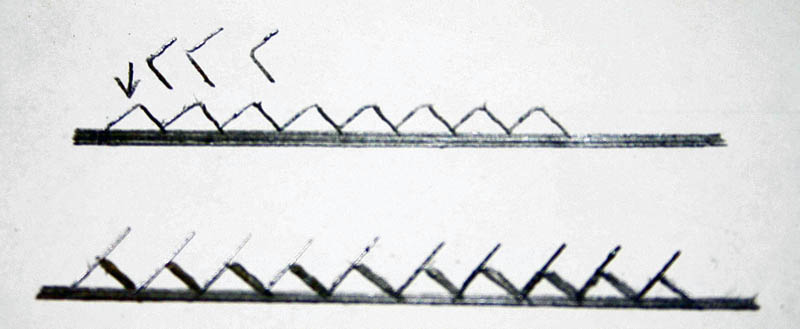
Figure 2
After all this is done I then gave it all a litlle trim to make all of the sides even so that they would have a nice appearance even though it would not be seen inside of the model. (fig 3) After I was satisfied I was then ready to glue this section into place on the model.
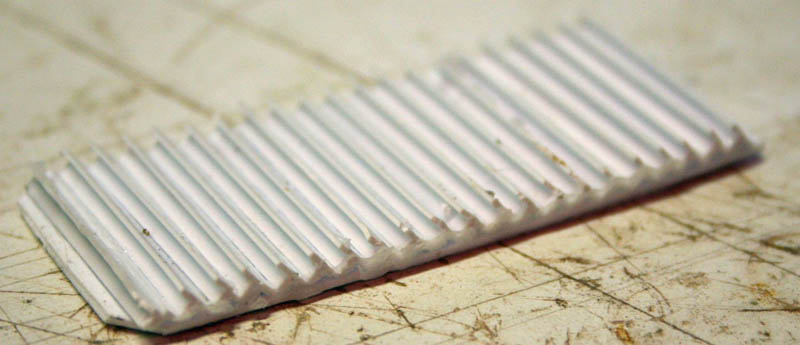
Figure 3
In (fig 4) you can see how the vent looks inside of the model after it is glued into place. In my opion this will give the model that perfect efect of depth into a vent that most models do not show or that some one may not be able to do. This can be done within 2 days for a Burke class DDG and just a couple of hours for a Perry class FFG. THis is a very easy project after you have made the first vent and it should add a lot of realism to the model that you are building.
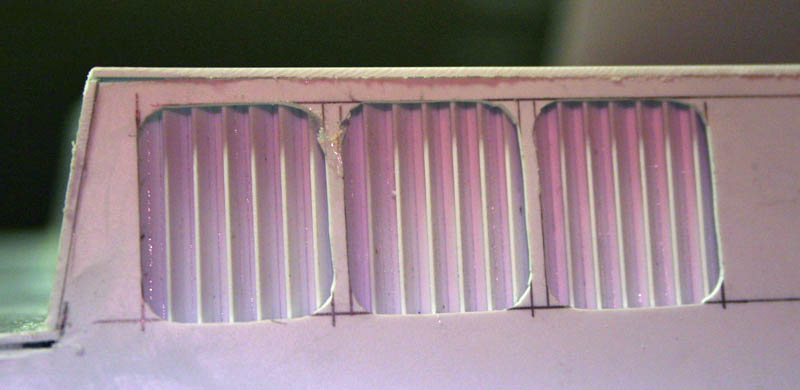
Figure 4

Back to Construction Articles
383
Version 1.0 10/07