
Making propellers from scratch
Please note - this is a more advanced operation, and involves using chemicals and high heat for soldering. Please read and observe all safety rules for your materials and equipment!
If you have access to a lathe and small milling machine, you can make props that are at least as good as those available commercially. In fact, you could probably make them without those tools, but of course it would be a lot more work. The nice thing about making your own props is that you can customize them to perform exactly the way you wish. Also, it is a way to get an unusual prop that not available elsewhere.
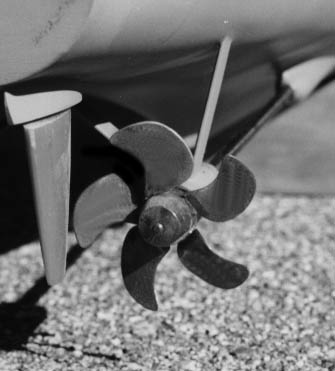
A home built prop from my DDG-53 model
I used a Sherline lathe and Milling machine (although the label says Craftsman, it was made by Sherline). Other brands, such as Taig could also be used of course.
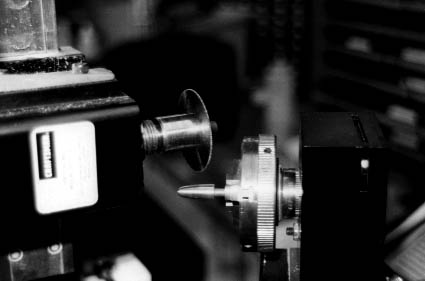
After you have determined the size of the finished propeller, the number of blades and the pitch angle, you are ready to cut metal. The first thing I do is take some brass round stock, and cut it to about .060 ( ~ 1.5mm or a sixteenth of an inch) over the final size of the hub. I then face the end, making sure that it is 90 degrees to the hub; this will be the bearing surface where the prop meets the shaft or strut and a care to get a good finish will be rewarded with a prop that does not bind or wobble. I then drill a hole slightly under the size of the prop shaft, and ream to the final size. Reaming assures good fit, but careful drilling might do an adequate job as well. Once the propeller hub blank has been reamed to final shaft size, I part it off from the remainder of the bar stock, using a cut off tool. A stub of prop shaft is temporarily superglued to the hub blank, and then this is chucked into the lathe.
![]()
I am using Sherline's WW collet set to hold the shaft, as it is a bit more accurate than the three jaw chuck. Every bit of accuracy improves the final product.

The hull is machined down with very light cups, creating the profile in steps. I have found that by mounting the hub on a section of shafting, the prop hubs revolves extremely true, without noticeable wobble, a problem that had plagued some of my earlier efforts at propeller making.
Once the blank is roughed out by turning, a smooth cut file smoothes out the transitions between the steps. Sanding with 120 to 400 grit sandpaper puts a nice final finish on the blank.
Once the hub blank is finished, it is time to mill the slots for the propeller blades. This is an important step, as a tight fit between blade and hub eliminates the need for a jig to hold the blade in place while soldering. I use a jeweler's slotting blade - these are available in many sizes from .010 to .125 and thicker. I find that .030 works for props in this scale, as it is slightly less than 1/32 of an inch. If you do mill the slot a bit too wide, don't worry, there are some adjustments that can be made later. Do try for a tight fit though, with the blade having to be lightly tapped into place. The angle of the hub to the slotting cutter is the propeller root pitch angle, generally between 30 and 45 degrees.
With your hub turned and milled, it is time to make the blades of your propeller. These are brass sheet, cut roughly to shape with tin snips.
![]()
The are then stacked together to assure a uniform shape. I was using Shurtape double sided tape (a great tape for most machining operations), but have since used a small pair of needle nose Vise Grips to hold the stack together. I put a small sacrificial strip of brass on the top and bottom of the stack to avoid marring the blade surface. ( I am considering purchasing a pair and grinding the jaws smooth for these types of operations).
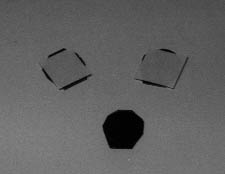
However you hold them together, file and sand them until you get the blade shape you desire.
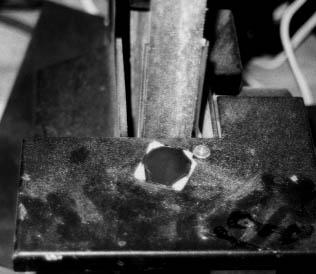
When the blades are shaped, you are ready to solder them to the hub. You will need a full sized propane torch, as a micro torch does not supply enough BTU's of heat to overcome the mass of a solid brass hub.
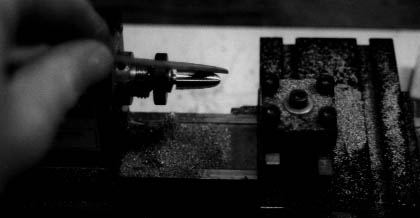
First, you will have to remove the stub shaft that was used to turn hold the hub for the machining operations. Using a small vise and a pair of pliers, gently heat the hub until you can pull the shaft free. I use a miniature vise loosely gripping the shaft, and pull against the jaws of the vise. Have a heat resistant pad under the hub to catch it when it falls free, or you risk marring the surface. Caution - heated CA glue fumes are toxic, you should do this operation in a well ventilated area!
Once your hub has cooled, clean the mounting hole and the slots for the blades thoroughly. The reamer or drill you used to bore the shaft hole will work well for this area; a file of the correct size or folded sandpaper will clean the slots. You should try and get the area bright and free from contamination prior to soldering.
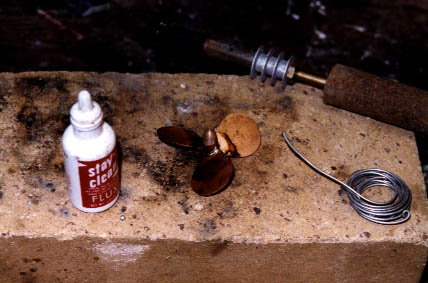
To solder the blades in place, apply flux to the blades and hubs, and then heat the hub and not the blades, as your heat will spread from the hub when it is sufficiently hot. You risk overheating the blades if you apply heat directly to them. When the flux begins to bubble, apply the solder sparingly to the joint - you want to see a thin perimeter of solder around each blade, not a huge glob. When the hub cools, you will see a black residue that is easily cleaned off with water.
To inspect your solder joint, first look at it - a good joint will be shinny and have no dull spots are areas of balled up solder. If it looks good, hold the propeller by the shaft hole with an undersize bar, and then take a brass bar and lightly tap each blade. You should hear a clear, bright tone. If you hear a buzz or dull noise that is a sign that the joint will fail.
Once your blade has been soldered, you can sand the blades lightly with 600 grit, and then polish to the degree you wish. Remember that most ships propellers have a milled finish, but of course it is very tempting to shine the heck out of you nice brass prop! If you do decide to polish it, a soft buffing wheel mounted in a Dremel Tool and automotive rubbing compound will do the job in short order.

Back to Construction Articles
651
Version 3.0 4-19-20