
Photoetched parts have their place in warship construction, but when you get to larger scales their is not substitute for three dimensional parts built up out of components. In this article, I will illustrate my methods for building these parts in 1/48 scale.
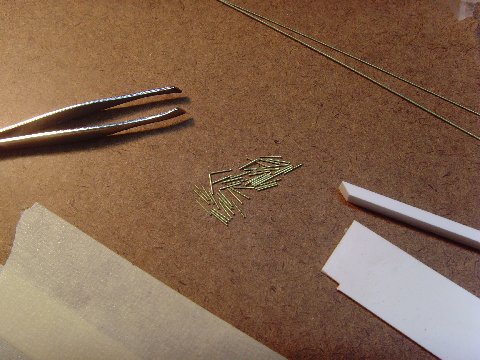
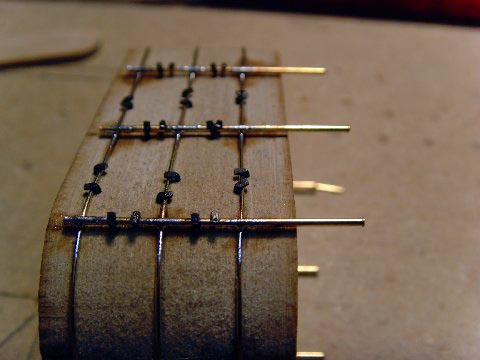
Start by cutting the rungs 1/4 inch long. You can saw them, but flush cutting side cutters are much faster and will leave one square edge. Xuron makes a nice product that will last a long time if you use them only for brass, and they are available from Micromark, among other resellers. Clean all the parts to a bright finish with a scotchbrite pad or alcohol as needed. Successful soldering depending on clean and tight mating metals.
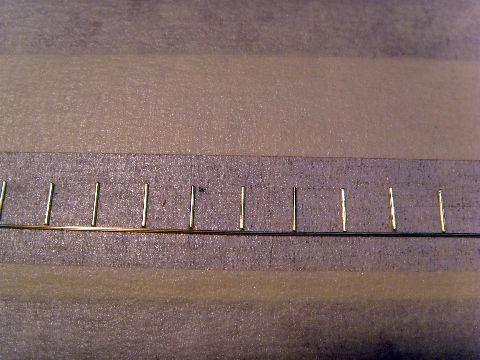
Layout a strip of masking tape or double sided tape, and mount one of the side rails.

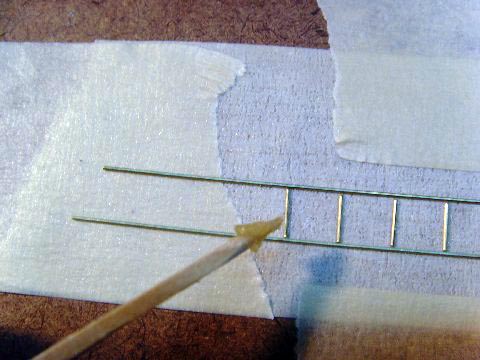
I place the rungs against the first side rail, using a spacer jig make from Evergreen Styrene strip, 1/4" X 1/8". To keep the jig from sticking to the tape, I sand a taper onto the end.
Once the rungs are placed, do a reality check to make sure that they are square to the rail. There is no substitute for a keen eye, but you can make jigs to help you as needed. Again, Evergreen is invaluable here. This is the time to make any adjustments.

Apply paste flux very sparingly to the rail and the rungs. You can use a toothpick or microbrush (available at most hobby shops) to transfer the paste to the parts.
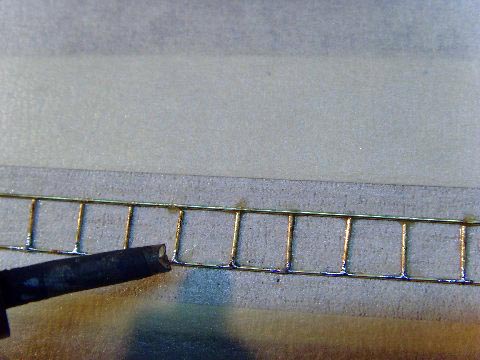
Use a soldering iron with a tip in good condition (they do need to be replaced occasionally). Be sure to clean and tin the tip to allow quick and efficient heat transfer. Don't feed the solder in using the spool; a better technique is to use a razor blade or knife to slice off thin sections, lay them across the joint and bring the heat from the opposite side until it melts the solder into the joint. The soldering iron should not touch the solder going into the joint. This will result in far less cleanup.
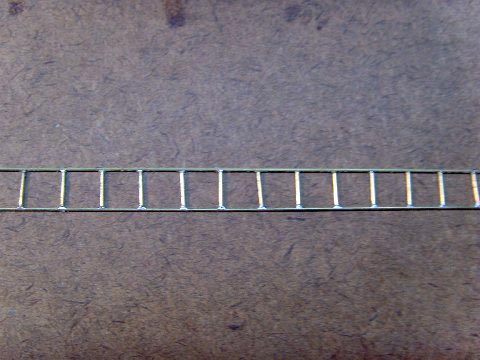
Attach the other rail using the same technique.
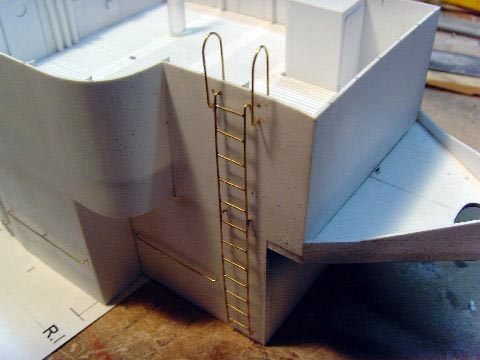
Once the assembly is soldered, you can remove it from the tape, clean any residue with alcohol or thinner, and clean the part as needed with a file or sandpaper. Mount the part to the mast or superstructure.
You see these on a lot of World War II designs, particular those done prior and in the early days of the war, before production techniques favored more squared off superstructures.
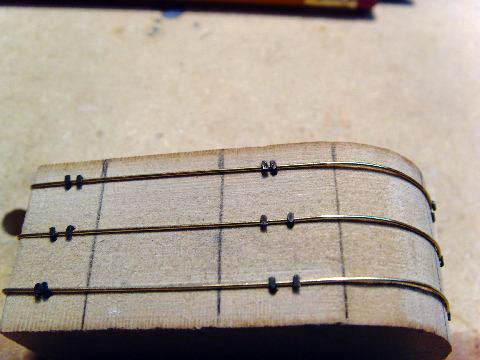
Start by making a forming fixture out of soft wood. In this care, I am using MDF (Medium Density Fiberboard) a nice material for patterns that is available at lumber yards or home centers. To start the fun, copy the plan of the railing and attach it to the wood using spray adhesive or rubber cement. Once the paper is dry, bend .020" brass wire tot he shape of the former. As one of my hobbies is model railroading I use track spikes to hold the wire in place.
1/32" uprights are laid over the rails, and again held in place with the railroad spikes.
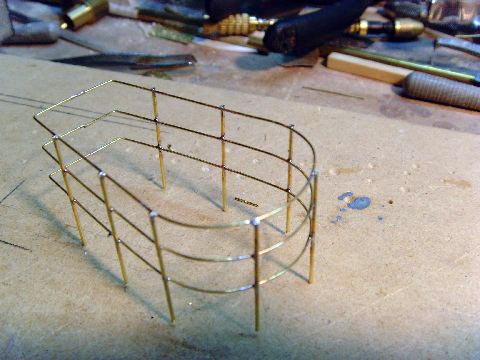
The intersections are carefully soldered using the same techniques as above. After soldering is complete, pull the spikes and carefully remove the assembly from the fixure.
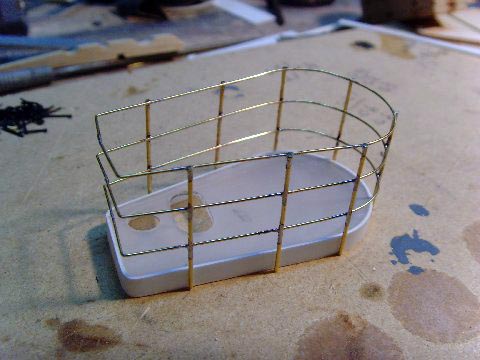
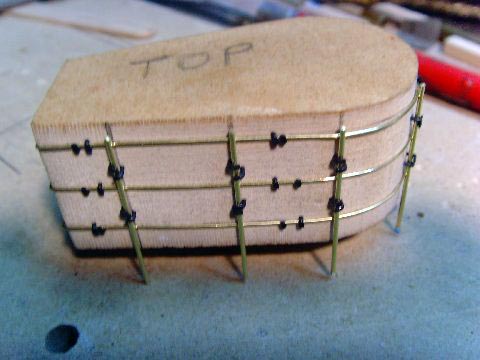
Clean up the joints using files, sanding sticks or sandpaper, and then clean the assembly with alcohol to remove any residual flux. Attach to the support structure with superglue.
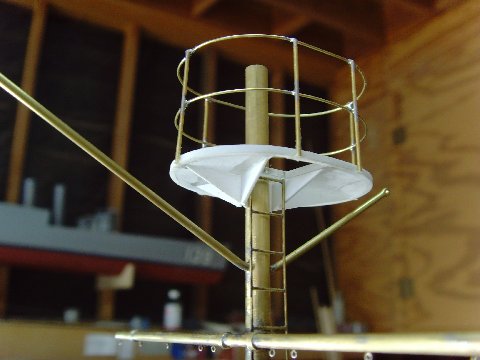
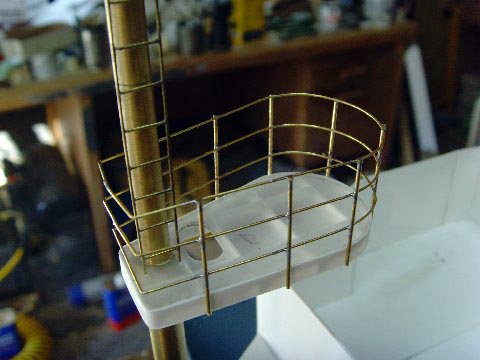
The finished part is dimensionial and strong.
Joe Hanacheck is the owner of West Coast Warships, a supplier of 1/48 scale Warship Hulls.

Back to Construction Articles
402
Version 2.0 4-19-20